
www.creativesnugglies.com
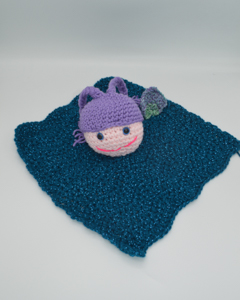
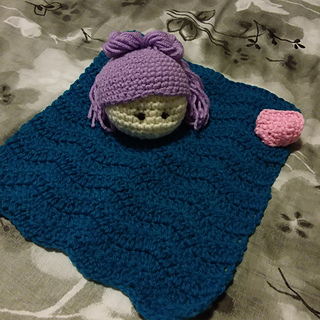
Today, I have 2 patterns ready to release to you. The first one is Avery the Mermaid Lovey! She is a fun, adventurous, and sweet security blanket in which any mermaid lover would be thrilled to have! She works up really quickly! You can complete her in about a couple of hours or so. She will remain a FREE pattern here on my blog forever! You can purchase a PDF copy in our Etsy Shop, Ravelry, and Ribblr. The PDF Premium version has detail pictures, etc.
As a former crochet maker, mermaids were always a high seller for me. I knew I wanted to create my own Mermaid Design Collection! Also, I have a 7 year old little girl, Bella, who absolutely loves anything girly such as princesses, mermaids, etc. She was my inspiration. Bella thought the braids were cute, but she also thought that next time maybe I should make them longer! Have fun creatively deciding how to the hair. I know I did!
Purchase the Premium PDF version without ads/affiliate links.
Or purchase both Premium PDF patterns and save $2 with the Mermaid Bundle!
Just a quick FYI, this post may contain affiliate links. View my disclosure policy here for the details. Fair Warning, it is long and boring, but it does the trick!

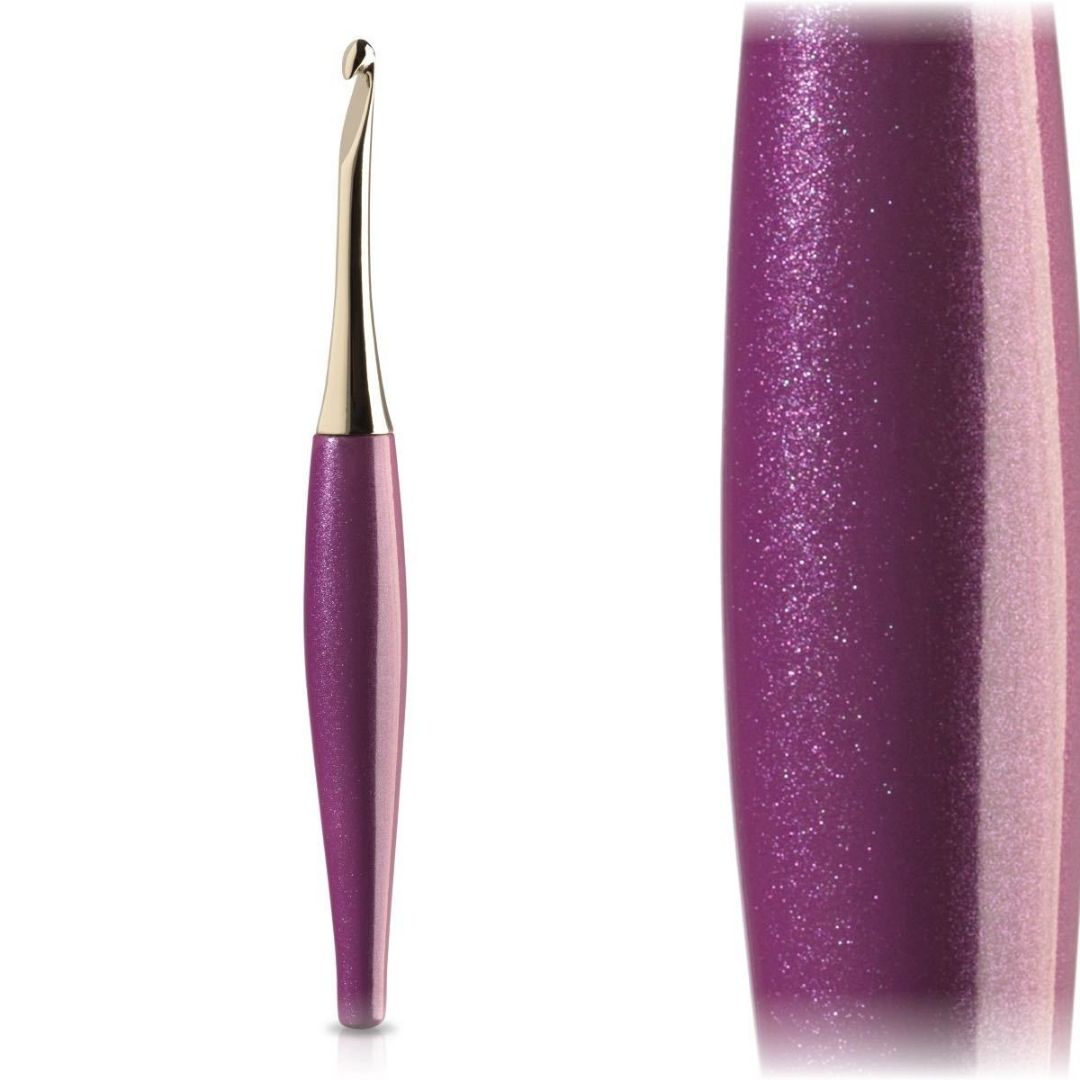
Click here to shop all the Furl Candy Hooks! I have the Blueberry and absolutely love it!
Materials:
● 120 yards, Worsted Size 4, I Love This Yarn Variegated 5 oz./142 grams, 252 yards/230 meters in Teal Sparkle.
● 90 yards, Worsted Size 4, I Love This Yarn Solid 7 oz./199 grams, 355 yards/325 meters in Soft Pink.
● 50 yards, Worsted Size 4, I Love This Yarn Solid 7 oz./199 grams, 355 yards/325 meters in Amethyst.
● 20 yards Worsted Size 4, I Love This Yarn Variegated 5 oz./142 grams, 252 yards/230 meters in Herb Garden
● HOOK: US G/6 4.0 mm; US J/10 6 mm
● Small Amount of Polyfil
● Yarn needle to weave in ends
● Stitch markers
● Scissors
● Safety Eyes – Optional
Experience Level: Easy
Gauge:
11.5 stitches x 6.5 rows = 4” x 4” square blocked.
Pattern used for gauge: DC
Size:
Lovey Size: Approximately 13.5” x 12.5”
Height of the Head attached to blanket: 3.5” Tall
Head Width 5” across
Pattern Key:
SC – Single Crochet
Sc2tog – single crochet decrease
SL ST – slip stitch
FO – Finish Off
ST(S) – Stitch/stitches
Ch – Chain
Rnd(s) – Round(s)
MC – Magic Circle
Color A – Teal Sparkles
Color B – Soft Pink
Color C – Amethyst
Color D – Herb Garden
Special Stitches:
DC2TOG
● To decrease in double crochet, work the first double crochet until only 2 loops are on the hook. Yarn over, place hook in next stitch, yarn over, pull through stitch, yarn over, pull through 2 loops (3 loops on hook). Yarn over, pull yarn through all 3 loops for a completed decrease.
Notes:
● Read through the entire pattern first.
● The head is worked in continuous rounds. Do not join while making the head. Use stitch markers to know where your first stitch in the round is.
● Beginning chain does not count as a stitch throughout pattern.
● Sl St does not count as a stitch throughout the pattern.
● Repeat stitches between * and * around.
● Alternative to MC – Ch 2; x SC in the 2nd chain from the hook.
Pattern Instructions
Part 1: Blanket
Use J/ 6.0 mm hook.
Row 1: Using Color A, ch 35. 1 DC in the 4th ch from the hook. 1 DC in the next ch. [DC2TOG over the next 2 ch] twice. 1 DC in the next ch. 2 DC in the next ch. *2 DC in the next ch, 1 DC in the next ch. [DC2TOG over the next 2 ch] twice. 1 DC in the next ch. 2 DC in the next ch. Repeat from * to end. Turn. (32 sts including the beginning chain 3)
Row 2: Ch 3. 1 DC in the first st. 1 DC in the next st. [DC2TOG over the next 2 sts] twice. 1 DC in the next st. 2 DC in the next st. *2 DC in the next st. 1 DC in the next st. [DC2TOG over the next 2 sts] twice. 1 DC in the next st. 2 DC in the next st. Repeat from * working the last 2 DC in the top of beginning Ch 3. Turn. (32 sts)
Rows 3-18: Repeat Row 2. FO at the end of Row 18. Weave in tails.

Check out these stunning Pisces – brand new line in the Streamline Swirl Galaxy series! These are gorgeous! I would love to get these to work with! Click here to go check them out on the Furl website!
Part 2: Mermaid Head
The mermaid head is worked in continuous rounds without joining. Use a stitch marker to mark the first stitch of each round. Use G/4.0 mm hook
Rnd 1: Using Color B, 6 SC in MC. (6 sts)
Rnd 2: 2 SC in each st around. (12 sts)
Rnd 3: *SC in the next st; 2 SC in the next st.* Repeat around. (18 sts)
Rnd 4: * SC in the next 2 sts; 2 SC in the next st.* Repeat around. (24 sts)
Rnd 5: * SC in the next 3 sts; 2 SC in the next st.* Repeat around. (30 sts)
Rnd 6: * SC in the next 4 sts; 2 SC in the next st.* Repeat around. (36 sts)
Rnds 7-12: SC in each st around. (36 sts) (6 total rounds)
***Insert and secure eyes in the front of the head between rounds 9 and 10 with 4 stitches between the eyes.***
Rnd 13: *SC in the next 4 sts; sc2tog.* Repeat around. (30 sts)
Rnd 14: *SC in the next 3 sts; sc2tog.* Repeat around. (24 sts)
***Start Stuffing the Head.***
Rnd 15: *SC in the next 2 sts; sc2tog.* Repeat around. (18 sts)
Rnd 16: *SC in the next st; sc2tog.* Repeat around. (12 sts)
Rnd 17: SC in each st around. (12 sts)
***Finish stuffing head firmly.***
Rnd 18: Sc2tog around. FO with a 6” inch tail to sew to the body. (6 sts)
Weave tail in and out of the front loops of Rnd 18 to close the hole.
Face: Embroider a smile on the mermaid head with a piece of yarn using the picture as a guide.

Check out this beautiful 8 pattern collection for you and your home using modern Granny Squares from my dear designer friend Fiona from Cosy Rosie UK! Click here for more details!
Mermaid Hair:
Use G/4.0 mm hook and work in continuous rounds. Use stitch marker for beginning stitch of each round.
Rnd 1: Using Color C, 6 SC in MC. (6 sts)
Rnd 2: 2 SC in each st around. (12 sts)
Rnd 3: *SC in the next st; 2 SC in the next st.* Repeat around. (18 sts)
Rnd 4: *SC in the next 2 sts; 2 SC in the next st.* Repeat around. (24 sts)
Rnd 5: *SC in the next 3 sts; 2 SC in the next st.* Repeat around. (30 sts)
Rnd 6: *SC in the next 4 sts; 2 SC in the next st.* Repeat around. (36 sts)
Rnds 7-10: SC in each st around. (36 sts) (4 total rounds)
Rnd 11: SC in the next 14 sts. HDC in the next 2 sts. SC in the next st. Sl st in the next 2 sts. SC in the next st. HDC in the next 2 sts. SC in the last 14 sts. Sl St in the next st. FO with a 6” tail to sew to the head. (36 sts)
Tail:
Worked in rows and using a G/4.0 mm hook.
Row 1: Using Color D, ch 15. SC in the 2nd chain from the hook. SC in the next 5 chains. Sk next 2 chains. SC in the next 6 chains. Turn. Ch 1. (12 sts)
Row 2: SC in the first stitch. SC in the next 4 stitches. Sk next 2 stitches. SC in the next 5 sts. Turn. Ch 1. (10 sts)
Row 3: SC in the first stitch. SC in the next 3 sts. Sk next 2 sts. SC in the next 4 sts. Turn. Ch 1. (8 sts)
Row 4: SC in the first st. SC in the next 2 sts. Sk next 2 sts. SC in the next 3 sts. Turn. Ch. 1. (6 sts)
Row 5: SC in the first st. SC in the next st. Sk next 2 sts. SC in the next 2 sts. FO leaving a 6” tail to sew to blanket. (4 sts)
Assembly:
Sew the hair onto the head centering the 2 sl sts in the middle of the front the mermaid.
Ponytail:
Using Color C, cut 20 individual strings 20” long (or however long you want for your pigtails) for pigtails. Using a crochet hook or needle, pull each string through a couple of stitches between rounds 2 and 3 on either side of the hair. Then braid the hair or style how you like! I braided the hair and did pigtails. Trim as necessary on the ends. I used a rubber band at the end. I also used embroidery thread and sewed buttons onto the top of the pigtails. That is totally optional!
Face of Mermaid Doll:
Using needle and embroidery thread, add a mouth.
Sew the head onto the center of the blanket. I chose to sew it diagonally facing a corner of the blanket.
Sew the tail on the 9th row near the edge.
Yarn and level symbols courtesy of the Yarn Craft Council at www.YarnStandards.com
Original Design by Christina Ryan
Thank you for choosing Creative Snugglies Designs. You are welcome to use this pattern to create and sell items created by you. If you sell your items online, please include a link back to my shop. This pattern and the photographs, that I provided for your convenience, are my intellectual property. They are protected by copyright and may not be used in any form. You may not share, copy, reproduce, sell, or alter this pattern and claim it as your own.
I would LOVE to see your creations so please share your finished work! I have included links to my social media and store pages. When you share your creations, please hashtag with #CreativeSnuggliesDesigns or #CreativeSnugglies and tag me so I can find your work! Please do not hesitate to contact me with any questions at CreativeSnugglies@gmail.com and I will help you with the pattern.
Congrats you have completed a beautiful Mermaid lovey.
Purchase the Premium PDF version without ads/affiliate links.
Or purchase both Premium PDF patterns and save $2 with the Mermaid Bundle!
I want to thank my testers who tested the mermaid security blanket! Thankfully, they both tested the lovey and the Mermaid!
I want to thank May Fong for testing my pattern. I loved all of her photos. You can see all of her photos here! She did an amazing job! I look forward to working with her in the future as well.

I also want to thank my other tester Anja Harrington for testing my pattern as well. Without a doubt this mermaid lovey turned out amazing as well. You can check out all of her pictures here. I look forward to working with her in the future as well.
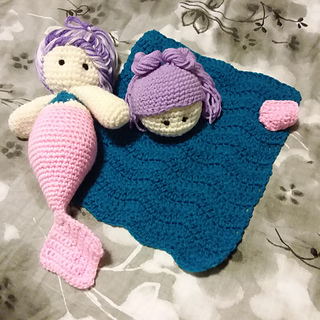
May Fong also took this lovely photo of the mermaid and the lovey together! You can purchase PDF version of lovey as well as the mermaid together by clicking here. By doing so, you will save a little bit on your purchase.
Click here to see our other blog post about Isla the Adventurous Mermaid Premium Pattern released today as well!